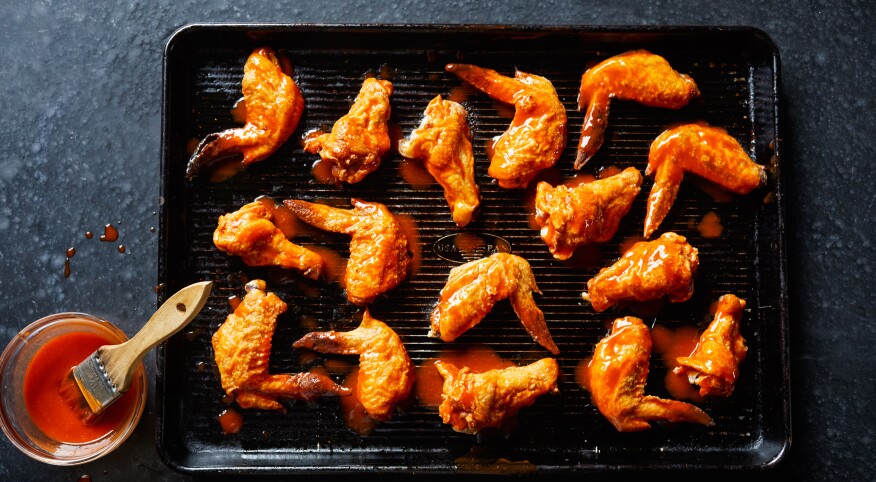
To make perfectly crispy chicken wings:
Step 1: Pat the wings dry with a paper towel
Step 2: Toss them in baking powder
Step 3: Refrigerate overnight
Step 4: Add breading
Step 5: Bake for 40 to 45 minutes at 425° to 450°F.
That’s it. And I realize it’s a bold move to share the recipe right up front instead of hiding it beneath four or five paragraphs about the first wings I ever ate, what wings mean to me, how I lost my virginity eating wings … blah, blah, blah. You’re busy. You don’t want to waste time. You just want crispy wings.
Trust me, though, you’re going to want to keep reading. Because how I landed on those five elusive steps is a pretty educational journey.
* * *
The first time I tried to make my own wings, I used baking soda instead of baking powder. Eating them was like gargling kinetic sand covered in buffalo sauce. As I gagged and coughed on that abominable culinary fiasco, I realized I was out of my league. I needed help.
I reached out to chefs, restaurateurs and food scientists to tell me what I was doing wrong.
Pat your wings dry
“If you want your wings crispy, remove as much excess moisture as possible,” says Jeanette Kimszal, a registered dietitian. “More moisture during cooking will result in softer chicken and will also hinder the flavors produced from a successful Maillard reaction.”
While “Maillard reaction” sounds like the next Mission Impossible movie subtitle, it’s actually the scientific principle that explains what makes wings delicious. The technical explanation has to do with complex chemical reactions between amino acids and sugars when food is exposed to heat. All of those sophisticated reactions are responsible for the golden brown color, crispness and flavor in fried foods.
Coat them in salt or baking powder
The next step is to toss the wings in some sort of seasoning before refrigerating them overnight. The top two suggestions were baking powder and salt. Baking powder has no flavor but adds surface area to the wings, which can increase the crunch, and allows for more “sauceable” real estate later. Salt draws out moisture and also tenderizes the meat.
I made the mistake of using too much baking powder with my first batch. After exploring online, I noticed a tip common among many recipes — use 1 to 2 tablespoons of baking powder for every pound of wings being cooked, which ended up working perfectly.
Refrigerate them overnight
Use a wire rack to allow air flow, and place it above a cooking sheet lined with foil or paper towels to catch the leftover juices and moisture that will drip down overnight.
“The cool air from the refrigerator will help the baking soda in the baking powder draw out the moisture on the surface of the wings,” says Kimszal. “This will create a drier surface that will help improve crispness.”
And don’t skimp on that drip pan, unless you want your wife’s weekly meal-prep assortment getting covered in wing goo. Trust me.
Cook them for 40 to 45 minutes at 425° to 450°F.
Your best chance at foolproof crispy chicken wings is a deep fryer, but most of us don’t have the amenities of an average sports bar. More than likely, you’re working with an air fryer, a convection oven (like mine) or a regular, radiant oven. The first two are ideal, as they work by using fans to circulate hot air around whatever’s cooking, giving it a more even bake. But with a quick hack, a regular oven will work just fine.
“Preheat your oven plus 50 degrees if you’re not using convection or air frying,” says chef, author and food expert Allen Bixby. “Convection ovens and air fryers do tend to give better results because they force heated air against every surface of the food. In a radiant oven, the heat is passive.”
Bread them
Classic wings are served naked, but the case for breading your wings is strong. First, the process allows wings to achieve crispness without having to cook them extra well done. Second, the coating absorbs and holds more sauce than a “naked” wing.
“Breading is a broad term that encompasses just about any dry ingredient group, from seasoned flour to panko bread crumbs, that you roll your food in to get it coated,” says Bixby. “Typically breading is done immediately before cooking, although heavier coatings will benefit from 15 minutes of rest in between to help the breading stay in place.”
If you find that your breading ingredient won’t stick, try a spray or two of cooking oil to help it adhere to the chicken skin. And then you can get as creative as you want. Like I did …
Row 1: Takis Blue Heat tortilla chips
Row 2: the leaked KFC recipe, Doritos Cool Ranch tortilla chips
Row 3: panko, Lay’s Classic Potato Chips
Row 4: cornflakes, Fruity Pebbles
(Sadly, the Fruity Pebbles weren’t as tasty as I’d hoped. But the Cool Ranch Doritos, panko, and cornflakes were winners.)

Jody Horton; Food Stylist: Olivia Caminiti
Follow Article Topics: Eating-&-Drinking


